Top Ad 728x90

Monday, April 27, 2026

Savory Potato Pancake with Creamy Yogurt Sauce

by


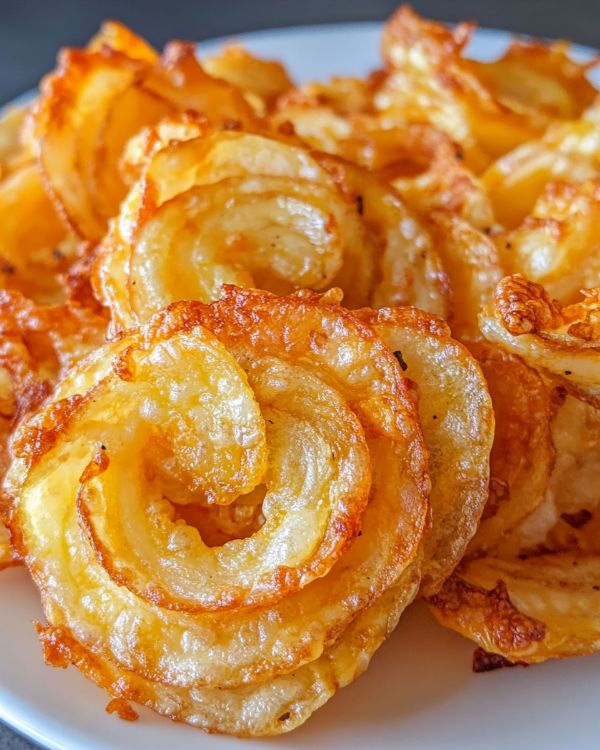
This Savory Potato Pancake is a versatile dish that brings together the goodness of grated potatoes, fresh vegetables, and a touch of cheese. It’s perfect for a hearty breakfast, lunch, or even a light dinner. Paired with a creamy yogurt sauce, this dish is both comforting and nutritious, making it a family favorite that’s sure to impress.


Preparation Time

  • Prep Time: 15 minutes
  • Cook Time: 30 minutes
  • Total Time: 45 minutes

Ingredients


For the Potato Pancake:Privacy Policy

  • 4 large potatoes, grated
  • Chopped spring onions (scallions)
  • 1 chopped bell pepper (any color)
  • 1 grated carrot
  • 3 eggs, beaten
  • 1 glass (240 ml) of milk
  • 200 grams all-purpose flour
  • 1 teaspoon baking powder
  • Cheese (shredded mozzarella, cheddar, or a blend) to taste
  • Salt and pepper to taste
  • Olive oil for greasing


For the Yogurt Sauce:

  • Chopped fresh parsley
  • Plain yogurt
  • 1 tablespoon mayonnaise
  • Salt and pepper to taste

Directions


  1. Preheat the Oven: Preheat your oven to 180°C (356°F).


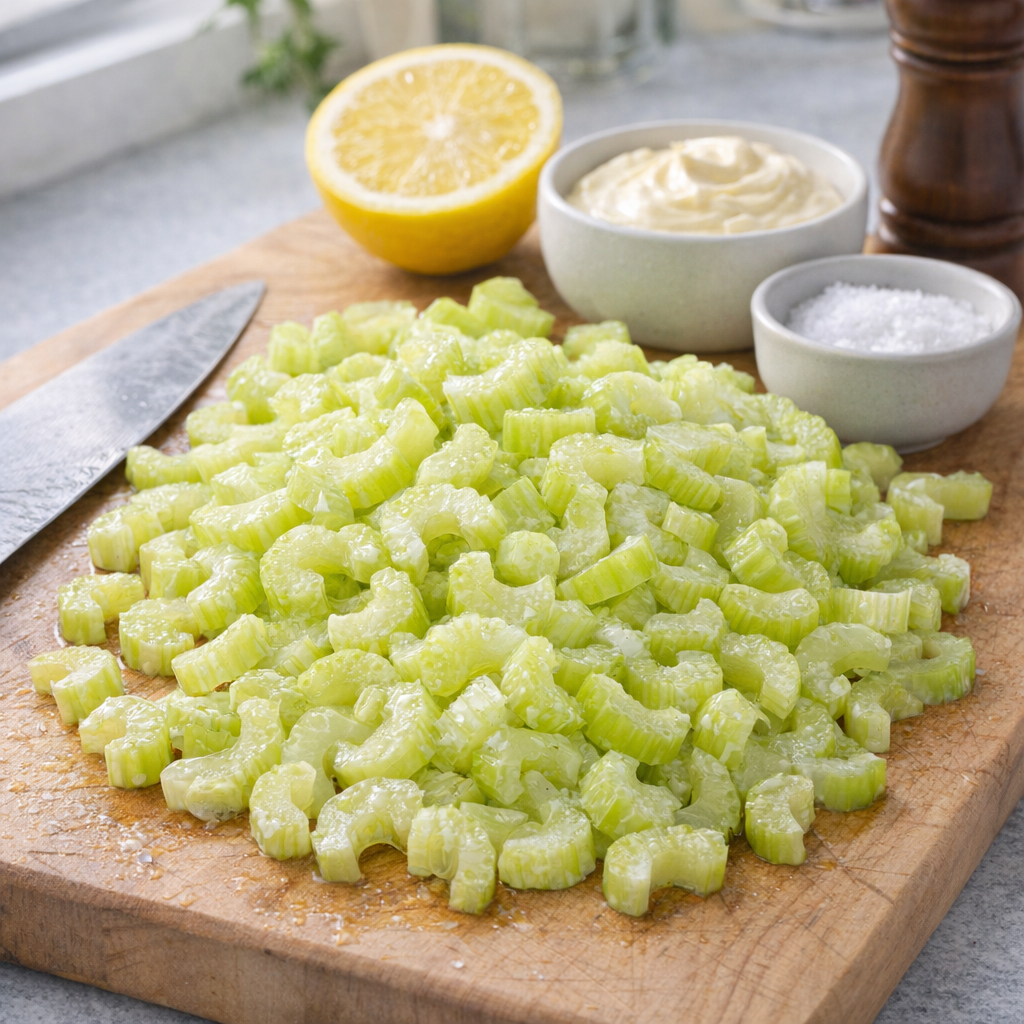
  1. Grate and Prep: Grate the potatoes using the large holes of a box grater or pulse them a few times in a food processor. Chop the spring onions and bell pepper, and set them aside.


  1. Mix the Wet: In a large bowl, whisk together the beaten eggs, milk, flour, and baking powder. Season with salt and pepper to taste.


  1. Combine Everything: Add the grated potatoes, chopped spring onions, bell pepper, and grated carrot to the wet mixture in the bowl. Fold everything together gently until well incorporated.


  1. Grease and Bake: Grease a baking dish with olive oil. Pour the potato mixture into the prepared dish and spread it evenly.


  1. Cheesy Goodness (Optional): If desired, sprinkle your favorite shredded cheese over the top of the potato mixture.


  1. Bake to Perfection: Bake the potato pancake in the preheated oven for 25-30 minutes, or until the top is golden brown and the center is cooked through.


  1. Whip Up the Sauce: While the pancake bakes, prepare the yogurt sauce in a small bowl. Combine chopped parsley, plain yogurt, mayonnaise, salt, and pepper to taste. Mix well until everything is incorporated.


  1. Serve and Enjoy: Slice the hot potato pancake into wedges and serve them with dollops of the creamy yogurt sauce on the side.

Serving Suggestions


  • Serve with a side salad for a complete meal.
  • Enjoy as a snack or light lunch with a fresh vegetable or fruit.

Cooking Tips


  • For a crispier top, broil the pancake for the last 5 minutes of baking.
  • You can use any type of cheese you like or omit it if you prefer a dairy-free version.

Nutritional Benefits

  • Potatoes: Provide complex carbohydrates and fiber for sustained energy.
  • Spring Onions and Bell Peppers: Rich in vitamins and antioxidants.


  • Carrots: High in beta-carotene, which supports eye health.


  • Yogurt: Offers probiotics for digestive health and protein for satiety.

Dietary Information

  • This recipe is vegetarian and can be made gluten-free by using gluten-free flour.


  • To make it dairy-free, substitute with a dairy-free milk and cheese alternative.

Storage Tips

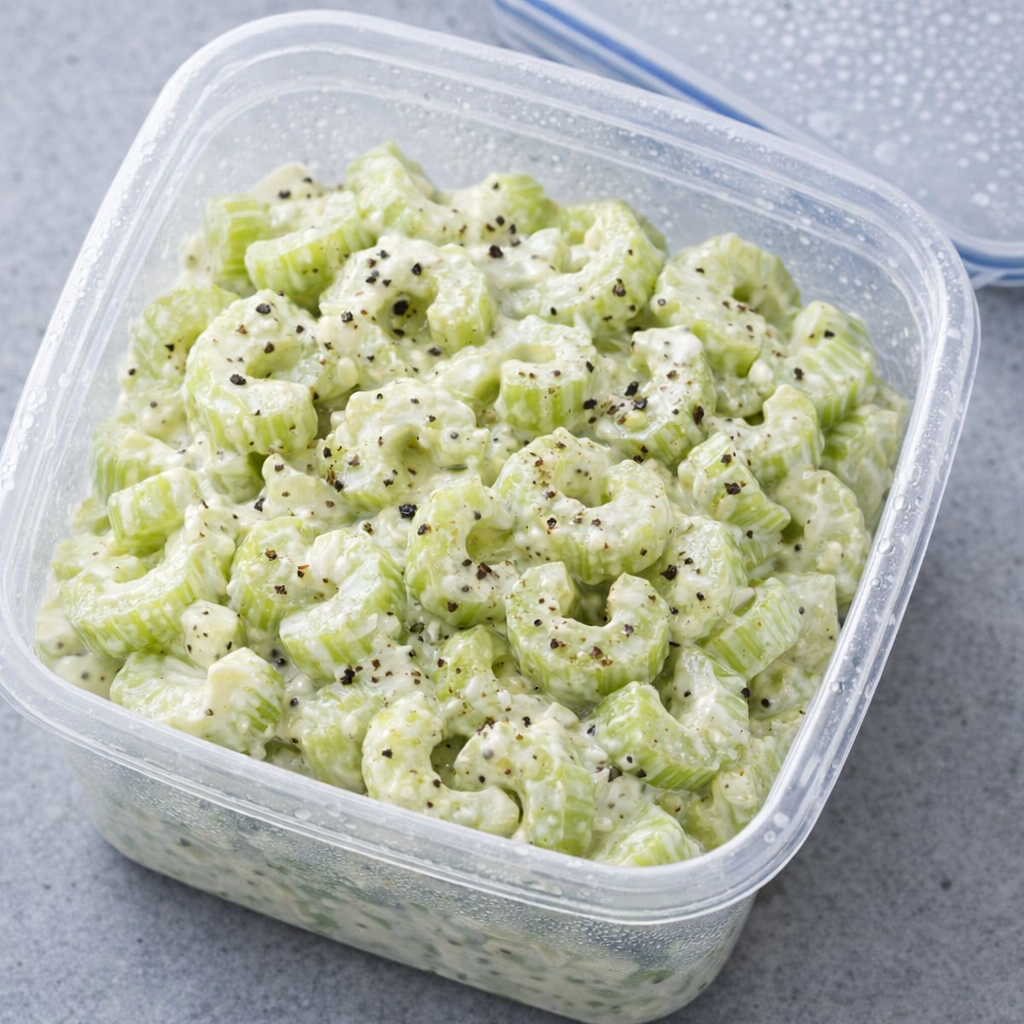
  • Store leftovers in an airtight container in the refrigerator for up to 3 days. Reheat in the oven to maintain crispiness.


  • The yogurt sauce can be stored separately in the fridge for up to 5 days.

Why You’ll Love This Recipe


  • It’s easy to prepare and requires minimal ingredients.


  • A delicious and hearty dish that’s both comforting and nutritious.


  • Versatile enough to be served for any meal of the day.

Conclusion


This Savory Potato Pancake with Creamy Yogurt Sauce is a delightful and satisfying dish that combines the best of comfort food with nutritional benefits. Its versatility and rich flavors make it a perfect choice for any meal, whether you’re feeding a crowd or just looking for a tasty treat. Enjoy this simple yet delicious recipe!


Frequently Asked Questions (FAQs)


  1. Can I use sweet potatoes instead of regular potatoes?
    Yes, sweet potatoes can be used for a sweeter flavor and additional nutrients. Adjust the cooking time if necessary.


  1. Can I make this recipe ahead of time?
    Yes, you can prepare the potato pancake mixture in advance and store it in the refrigerator. Bake it just before serving for the best results.


  1. Can I freeze the potato pancake?
    Yes, you can freeze the baked potato pancake. Cut it into portions, wrap it well, and store it in the freezer for up to 2 months. Reheat in the oven before serving.


  1. Can I add other vegetables to the mix?
    Absolutely! Feel free to add vegetables like zucchini, corn, or mushrooms to the potato mixture for added flavor and nutrition.


  1. What can I use instead of eggs?
    You can use a flax egg or chia egg as a substitute for eggs. Mix 1 tablespoon of ground flaxseed or chia seeds with 3 tablespoons of water and let it sit for a few minutes until it becomes gel-like.


  1. Can I use a non-dairy milk?
    Yes, you can use any non-dairy milk such as almond milk, soy milk, or oat milk in place of regular milk.


  1. How do I know when the potato pancake is done?
    The pancake is done when the top is golden brown and the center is firm and cooked through. You can check by inserting a knife or toothpick into the center; it should come out clean.


  1. Can I make the yogurt sauce in advance?
    Yes, you can prepare the yogurt sauce ahead of time and store it in the refrigerator until ready to use.


  1. Can I omit the cheese?
    Yes, you can omit the cheese if you prefer a dairy-free version or simply don’t like cheese.


  1. What can I serve with this potato pancake?
    This dish pairs well with a fresh green salad, steamed vegetables, or a side of fruit for a balanced meal.

Beef Liver and Onions

by


Ingredients

¼ cup of flour
1 lb beef liver
¼-½ cup of butter
½ tsp of salt
⅛ tsp of pepper
Oil to taste
1-2 tbsp of fresh minced sage
2 cups of thinly sliced onions
½ cup of beef stock
1 tbsp of minced Italian parsley
¼ cup of dry white wine

Preparation

First, you want to take a bag, and put the flour, the pepper, and the salt together in there.
-Cut the liver into pieces that are about a half an inch, and then, put them into the bag, shaking this until they’re coated. This will help with muting the taste of this.
-Get a skillet, and from there heat about 3 tablespoons of the butter, along with a little bit of oil, and from there, you want to sauté your onions on a medium-high sort of level, so that they’re nice and tender. You should see a small sheen of glossy on this.
-Once you see that, you want to take the onions, putting them inside a dish, and from there, sprinkle the onion as well with some pepper and salt.
-Heat up about 4 tablespoons of the butter, along with a small dash of oil to the skillet as well.
-Add in the liver and then cook this for about 5 or so minutes, until this dish starts to brown.
-Once this is finished cooking, put the onions directly onto the skillet, heating these up together with the liver as well.
-Take the liver and onions and put this onto a plate. Use a stock and the wine to deglaze this, and from there, you want to make sure the liquid is reduced in this until it creates a nice, thick sauce that will really give you something to enjoy with this.
-Take the liver, put it on a serving dish, and then, also add the onion to this. Add the sauce you just made, and then add a bit of parsley in order to garnish, and then you can serve it!

I thought my aunties' recipe was lost

by


Onion cheddar chips are a delightful twist on a classic snack, bringing together the comforting flavors of the Midwest with a touch of creativity. These crispy, golden spirals are reminiscent of the onion rings my grandmother used to make, but with a cheesy twist that makes them irresistible. Perfect for a cozy afternoon or a family gathering, these chips are a testament to the simple joys of home cooking.

These onion cheddar chips pair wonderfully with a hearty bowl of chili or a fresh garden salad. They also make a great accompaniment to a sandwich or can be enjoyed on their own as a satisfying snack. For a touch of indulgence, serve them with a creamy ranch or spicy sriracha dip.
Crispy Onion Cheddar Chips
Servings: 4
Ingredients
2 large onions
1 cup all-purpose flour
1 teaspoon salt
1 teaspoon black pepper
1 teaspoon paprika
1 cup buttermilk
1 cup shredded cheddar cheese
2 cups vegetable oil for frying

Directions
Peel the onions and slice them into 1/4-inch thick rings, separating each layer.
In a shallow bowl, mix together the flour, salt, pepper, and paprika.
Pour the buttermilk into another shallow bowl.
Heat the vegetable oil in a large skillet over medium-high heat until it reaches 350°F.
Dip each onion ring into the buttermilk, allowing the excess to drip off, then coat it in the flour mixture.
Fry the onion rings in batches, turning occasionally, until golden brown and crispy, about 3-4 minutes per batch.
Remove the fried onion rings and drain on paper towels.
While the onion rings are still hot, sprinkle the shredded cheddar cheese over them, allowing the cheese to melt slightly.
Serve immediately and enjoy the crispy, cheesy goodness.
Variations & Tips
For a spicier version, add a pinch of cayenne pepper to the flour mixture. You can also experiment with different types of cheese, such as pepper jack or gouda, for a unique flavor. If you prefer baking over frying, arrange the coated onion rings on a baking sheet and bake at 400°F for 15-20 minutes, flipping halfway through, until golden and crispy.

My aunt always brought this refreshing crunch to our April gatherings. Just 4 ingredients to whip up a rich and tangy side dish that disappears in min

by


This low carb 4-ingredient creamy celery salad is the kind of simple, retro side dish my aunt always brought to our April family gatherings in the Midwest. It’s all about that refreshing crunch of crisp celery wrapped in a rich, tangy mayonnaise dressing, with just enough seasoning to keep it lively. Because it uses only four basic ingredients and no special equipment, it’s a practical, last-minute dish that comes together in minutes and reliably disappears from the buffet table.

Creamy celery salad in a simple bowl

Think of it as an old-fashioned celery salad, pared down and modernized for anyone watching carbs but still craving something creamy and satisfying.

Serve this creamy celery salad well-chilled, straight from the fridge, in its plastic storage container or transferred to a simple serving bowl. It pairs nicely with grilled or roasted meats—think chicken thighs, pork chops, or a simple steak—because the cool crunch balances anything hot and savory. It’s also a natural fit on a spring or summer spread alongside deviled eggs, sliced tomatoes, and a green salad.

For potlucks or holiday gatherings, tuck it between heavier casseroles to add a bright, crisp contrast. Leftovers hold up well for next-day lunches, especially next to deli turkey or rotisserie chicken.

Creamy Celery Salad

Servings: 4


Ingredients

6 cups sliced crisp celery (about 1 large bunch, thinly sliced)

1/2 cup full-fat mayonnaise
2 tablespoons fresh lemon juice (or to taste)
1 teaspoon kosher salt, plus more to taste
Freshly cracked black pepper, for garnish (optional but recommended)

Sliced celery and dressing ingredients arranged for prep

Directions

Prep the celery: Rinse the celery stalks thoroughly under cool running water, paying attention to any grit trapped in the ribs. Pat dry with a clean kitchen towel or paper towels. Trim off the ends and any wilted leaves. Thinly slice the stalks crosswise into bite-size pieces; you want enough surface area so the creamy dressing can cling to the celery and create that glossy, crunchy texture.

Make the creamy dressing: In a medium mixing bowl, whisk together the mayonnaise, fresh lemon juice, and kosher salt until completely smooth. The mixture should be thick but spoonable, with a tangy edge from the lemon. Taste the dressing and adjust the lemon or salt slightly if you like a sharper or more seasoned flavor, keeping in mind that the celery will dilute the intensity a bit.

Mayonnaise and lemon dressing being whisked in a bowl

Combine salad and coat evenly: Add the sliced celery to the bowl with the dressing. Using a spatula or large spoon, gently fold the celery into the mayonnaise mixture until every piece is well coated. You’re aiming for a thick, creamy white coating that clings to the pale green celery without pooling excessively at the bottom of the bowl.

Chill in a plastic container: Transfer the creamy celery salad to a clean plastic tupperware-style container with a tight-fitting lid, smoothing the top so it looks even. Sprinkle the surface generously with freshly cracked black pepper for a speckled, slightly rustic finish. Seal the container and refrigerate for at least 30 minutes, or up to several hours, to let the flavors meld and the celery chill thoroughly.

Celery salad packed into a chilled storage container

Serve and store: Just before serving, give the salad a gentle stir in the container to redistribute any dressing that has settled. Taste and add a pinch more salt or a squeeze of lemon if needed. Serve cold, straight from the tupperware for a casual gathering, or spoon into a serving bowl. Return any leftovers promptly to the refrigerator, keeping the lid on tight to maintain crunch and food safety.

Variations & Tips

To keep this salad true to its low-carb, four-ingredient spirit, treat add-ins as optional extras rather than essentials. For a touch of sweetness and contrast, you can fold in a few tablespoons of very finely diced red onion or a small handful of chopped celery leaves, but remember that each addition moves you beyond the original four-ingredient concept. If you prefer a slightly lighter dressing, replace 2 to 3 tablespoons of the mayonnaise with plain Greek yogurt; this keeps the creaminess and tang while trimming the richness.

Creamy celery salad with optional red onion and celery leaves

For a more pronounced bite, substitute part of the lemon juice with apple cider vinegar, tasting as you go so the dressing doesn’t become too sharp. A pinch of garlic powder or onion powder can deepen the flavor without changing the texture. If you need this salad dairy-free, stick with a good-quality mayonnaise that contains no milk products and skip any yogurt substitutions.

Food safety tips: Always keep the salad refrigerated at 40°F (4°C) or below, since mayonnaise-based dishes can spoil if left at room temperature too long. At parties or potlucks, avoid letting it sit out for more than 2 hours total (1 hour if the room is very warm or the gathering is outdoors in summer). Use clean utensils each time you serve or taste the salad to prevent cross-contamination. Store leftovers in an airtight plastic container and enjoy within 2 to 3 days for best crunch and flavor; discard if there is any off smell, separation that doesn’t stir back together, or visible mold.

Friday, April 24, 2026

Creamy Cheesy Beef Bowtie Pasta

by


Creamy Cheesy Beef Bowtie Pasta

A rich and hearty pasta dish combining tender ground beef with bowtie pasta in a velvety cheddar and mushroom soup sauce. This American comfort food staple features savory seasonings and optional aromatic onions and garlic for depth of flavor.
Prep Time10minutes 
Cook Time20minutes 
Total Time30minutes 
Course: Main Dishes
Cuisine: American


Servings: 4 servings


Calories: 480kcal


Author: AI Generator

Ingredients

  • 1 lb ground beef
  • 8 oz bowtie pasta
  • 1 can (10.5 oz) cream of mushroom soup
  • 1 cup shredded cheddar cheese
  • 1/2 cup milk (optional, for creamier sauce)
  • 1 small onion, finely chopped (optional for added flavor)
  • 2 cloves garlic, minced (optional)
  • Salt and pepper, to taste
  • 1 tablespoon olive oil or cooking oil (if sautéing onion/garlic)

Instructions

  • Cook the bowtie pasta: Bring a large pot of salted water to a boil. Add the bowtie pasta and cook according to the package instructions until al dente (about 10-12 minutes). Drain and set aside.
  • Prepare the ground beef: Heat oil in a skillet if using onions/garlic. Sauté onion and garlic until fragrant then add beef. Brown beef, breaking into crumbles, and drain excess grease.
  • Add the cream of mushroom soup: Stir in the soup to create a base. Cook gently to warm the mixture.
  • Melt in the cheddar cheese: Add shredded cheddar gradually, stirring until fully melted into a smooth sauce. Add milk if desired for extra creaminess.
  • Combine pasta and sauce: Toss cooked bowtie pasta into the beef-sauce mixture until evenly coated.
  • Heat through and serve: Cook in skillet for 2-3 minutes on low heat, season with salt/pepper, and serve hot.

Notes

Optional aromatics like onions and garlic add complexity but can be omitted. Use vegetable oil as a halal-friendly option if substituting. Homemade mushroom soup is a great alternative if avoiding canned varieties. Mix in cooked, drained spinach for added nutrition and creaminess without alcohol/pork. Stir cheese gradually to avoid clumping for smooth sauce.

Raspberry Coconut Snowball Cake

by


Introduction

If you’re searching for a dessert that combines tropical charm with a burst of fruity freshness, Raspberry Coconut Snowball Cake is the perfect treat. This delightful cake marries the moist, tender crumb of a white cake infused with creamy coconut milk, with the tangy sweetness of raspberry jam and the delicate texture of shredded coconut. The aroma fills your kitchen with a sweet, inviting scent that hints at the tropical flavors to come. Whether you’re serving it for a special occasion or a cozy gathering, this cake’s soft texture, vibrant appearance, and balanced flavors will make it a favorite for anyone who loves a luscious, fruity dessert.

Prep Time, Cook Time, and Servings

Preparing this Raspberry Coconut Snowball Cake is straightforward and manageable, even for beginner bakers. The prep time takes about 15 minutes, giving you plenty of time to mix your ingredients and prepare your baking pan. The cake bakes for 35 to 40 minutes until golden and perfectly cooked through. In total, you’re looking at about 55 minutes from start to finish, including the crucial cooling time to let the cake set. This recipe yields a generous 12 servings, ideal for parties or family gatherings.

Ingredients

  • 1 box white cake mix (about 15.25 oz)
  • 1 cup coconut milk (full-fat recommended for richness)
  • 3 large eggs
  • 1/2 cup vegetable oil
  • 1/2 cup raspberry jam
  • 2 cups sweetened shredded coconut
  • 1-2 drops pink food coloring (optional, for a festive look)
  • Additional raspberry jam for brushing (about 2 tablespoons, warmed)

Step-by-Step Instructions

  1. Preheat and prepare: Heat your oven to 350°F (175°C). Grease a bundt pan thoroughly with nonstick spray or butter to ensure the cake releases easily.
  2. Make the batter: In a large mixing bowl, whisk together the white cake mix, coconut milk, eggs, and vegetable oil until the batter is smooth and lump-free. If you want a lovely rosy hue, add 1-2 drops of pink food coloring and blend until evenly tinted.
  3. Layer the batter and jam: Pour half of the cake batter evenly into the prepared bundt pan. Spoon half a cup of raspberry jam evenly over the batter surface. Using a knife, gently swirl the jam into the batter to create a marbled effect without mixing completely.
  4. Add remaining batter: Carefully spoon the remaining batter over the raspberry swirl, smoothing the top with a spatula for an even surface.
  5. Bake: Place the bundt pan in the preheated oven and bake for 35 to 40 minutes. Check doneness by inserting a toothpick into the center; it should come out clean or with just a few crumbs attached.
  6. Cool and decorate: Allow the cake to cool completely in the pan placed on a wire rack. Once cooled, invert the cake onto a serving plate. Lightly brush the top and sides of the cake with warmed raspberry jam, then press shredded coconut evenly over the entire cake surface to create a snowy coating.

Pro Tips for Perfect Results

  • Use room temperature eggs and coconut milk: This helps the batter blend more smoothly and rise better during baking.
  • Don’t overmix: When combining ingredients, mix until combined to avoid tough cake texture.
  • Grease the bundt pan well: This ensures your cake releases cleanly without tearing or sticking.
  • Swirl gently: When creating the raspberry swirl, be careful not to overdo it–you want a pretty marbled effect, not fully blended jam.
  • Cool completely before coconut coating: The raspberry jam layer sticks best when the cake is completely cool to prevent melting the shredded coconut.

Variations and Substitutions

You can customize this cake easily to suit your preferences or make it slightly healthier.

  • Healthier swaps: Substitute half of the vegetable oil with unsweetened applesauce to reduce fat and add moisture.
  • Jam alternatives: Use any berry jam such as strawberry or blueberry for a different fruity twist.
  • Milk options: For a dairy-free or vegan version, use coconut yogurt or a non-dairy milk alternative instead of eggs and milk, along with an egg replacer.
  • Nutty addition: Add 1/2 cup chopped macadamia nuts or almonds into the batter for crunch and texture contrast.
  • Decorative ideas: Top with fresh raspberries or dust with powdered sugar for added elegance.

Storage and Reheating Tips

Store your Raspberry Coconut Snowball Cake at room temperature, covered tightly with plastic wrap or in an airtight container, for up to 3 days. For longer storage, refrigerate the cake—wrapped well—to preserve freshness for up to a week. Before serving refrigerated cake, bring it to room temperature for about 30 minutes to release its full flavor and softness.

To reheat slices, warm them gently in a microwave for 15-20 seconds or in a low oven (around 300°F) for 5-10 minutes to restore tenderness. Avoid overheating to prevent drying out the cake.

FAQ

Can I make this cake gluten-free?
Yes! Use a gluten-free white cake mix instead of the regular box cake mix, and verify your other ingredients are gluten-free.
Is it possible to bake this in another pan besides a bundt pan?
Absolutely. You can bake it in a 9×13-inch pan or muffin tins, adjusting baking time accordingly (reduce for smaller portions).
Can I make the cake a day ahead?
Yes, you can bake the cake a day in advance. Store it covered at room temperature or in the fridge to maintain freshness.
What if I don’t have coconut milk?
You can substitute coconut milk with whole milk or another nut milk, but the coconut flavor will be less pronounced.
Why use pink food coloring?
It’s optional but adds a festive, pretty hue that complements the raspberry swirl and shredded coconut, making the cake visually appealing.

Nutrition Estimate (per serving)

Each serving of Raspberry Coconut Snowball Cake contains approximately 320 calories. It provides about 4 grams of protein, 40 grams of carbohydrates, and 15 grams of fat. The fat content mainly comes from coconut milk and vegetable oil, offering a rich, moist crumb. The carbs are largely from sugar and flour, while the raspberries add natural sweetness and antioxidants.

Strawberry Banana Pudding Dream

by


🍓🍌 Strawberry Banana Pudding Dream

✨ Introduction

If you love creamy desserts like your favorite no-bake treats (just like your quick cakes and cookies 🍰), this Strawberry Banana Pudding Dream is going to steal your heart! It’s rich, smooth, fruity, and layered with pure comfort. Perfect for busy days when you still want something impressive—just like your Death by Chocolate Dump Cake, this one is easy but unforgettable.


🛒 Ingredients

For the Creamy Base

  • 1 (5.1 oz) box instant vanilla pudding mix
  • 2 cups cold milk (whole or 2%)
  • 1 (8 oz) cream cheese, softened
  • 1 (14 oz) sweetened condensed milk
  • 1 (8 oz) whipped topping (Cool Whip), thawed

For the Layers

  • 1 box vanilla wafers
  • 3–4 ripe bananas, sliced
  • 1 pint fresh strawberries, sliced

👩‍🍳 Instructions

Step 1: Prepare the Pudding

  1. In a bowl, whisk together pudding mix and cold milk.
  2. Let it sit for 3–5 minutes until thickened.

Step 2: Make the Cream Mixture

  1. In another bowl, beat cream cheese until smooth.
  2. Add sweetened condensed milk and mix until creamy.
  3. Fold in whipped topping gently.
  4. Combine this mixture with the pudding and stir until smooth.

Step 3: Layer the Dessert

  1. In a 9×13 dish, add a layer of vanilla wafers.
  2. Add sliced bananas and strawberries.
  3. Spread a layer of pudding mixture.
  4. Repeat layers until everything is used, finishing with cream on top.

Step 4: Chill

  • Refrigerate for at least 4 hours (overnight is best for flavor!).

🍰 Methods & Tips

✔️ Best Method

  • Chill overnight → softer wafers + richer flavor
  • Use ripe bananas for natural sweetness

✔️ Pro Tips

  • Add a drizzle of strawberry syrup for extra flavor
  • Sprinkle crushed wafers on top for crunch
  • Want it richer? Add a layer of whipped cream between layers

📜 History & Inspiration

This dessert is inspired by the classic Southern banana pudding, a beloved American comfort dessert. Over time, creative variations added strawberries for a fruity twist—turning it into a refreshing, modern no-bake treat perfect for warm weather and gatherings.


🧁 Formation (How It Comes Together)

This dessert is all about layers:

  • Crunchy → vanilla wafers
  • Creamy → pudding mixture
  • Fresh → fruits

As it chills, everything blends into a soft, cake-like texture—almost like a chilled trifle.


❤️ Why People Love It (Lovers Section)

  • Kids love the sweetness 🍓
  • Adults love the creamy texture
  • Perfect for parties, Ramadan desserts, or family nights
  • No baking = stress-free!

🏁 Conclusion

The Strawberry Banana Pudding Dream is more than just a dessert—it’s comfort in a dish. Easy, quick, and incredibly satisfying, it’s the kind of recipe people will ask you for again and again.

Top Ad 728x90